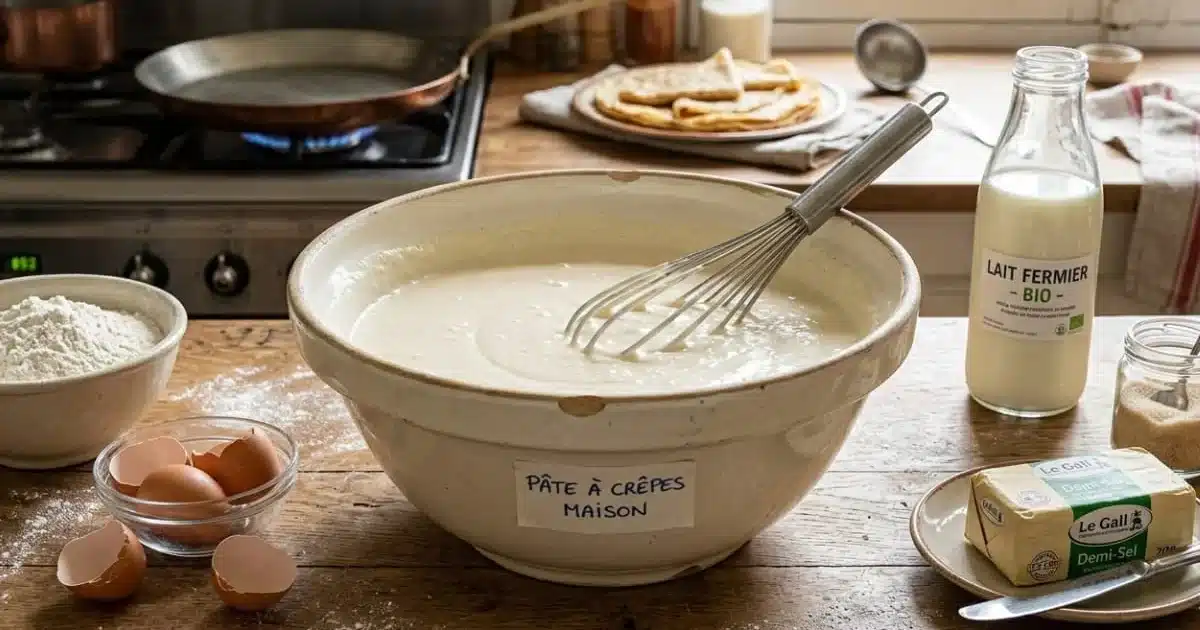
Lumpy pancake batter is one of the most common kitchen frustrations, but it's entirely avoidable. Whether you're a first-time cook or a seasoned home chef, these 7 proven techniques will help you achieve a perfectly smooth, lump-free batter every single time.
Few things are more disappointing than pouring what looks like good batter onto a hot pan, only to end up with uneven crepes — thick in some spots, paper-thin in others, with an unpleasant texture in every bite. The good news: lumps don't happen by accident. They have specific causes, and each one has a direct fix.
Here's what actually works.
Sifting the flour is your first line of defense
Flour is the main culprit behind lumpy pancake batter. When stored in a bag or container, flour compacts over time. That compressed powder doesn't dissolve evenly in liquid — it clumps, sticks, and forms the stubborn little balls that ruin an otherwise good batter.
Sifting breaks up those clusters before they ever touch any liquid. And the numbers back this up: sifting can reduce lump-related problems by up to 80%. Professional pastry chefs go further, recommending 2 to 3 passes through a fine-mesh sieve. For home cooks, two siftings cover 95% of cases effectively.
Choosing the right flour and sieve
The type of flour matters as much as the sifting itself. Type T55 flour is the standard recommendation for smooth pancake batter. Whole wheat flour (T150) is explicitly discouraged — its coarser bran particles behave differently in liquid and are far more prone to clumping.
For the sieve, a mesh of 1 to 2 mm is ideal. A quality pastry sieve costs less than €15 and can last up to 20 years with proper care. Sift directly over the mixing bowl to avoid any contact with moisture, which can alter the flour before you even begin.
Adding milk gradually changes everything
This is where most home cooks go wrong. Pouring all the milk in at once creates an immediate, violent contact between the dry ingredients and the liquid. The result: the outer layer of flour particles swells and seals, trapping dry flour inside. Those sealed pockets become lumps.
The fix is straightforward. Add the milk in 4 successive additions, each representing 25% of the total volume. After each addition, whisk for a minimum of 30 seconds. That's not a suggestion — it's the mechanical action needed to fully incorporate the liquid before the next pour.
Temperature of the milk matters too
Cold milk makes everything harder. When milk comes straight from the refrigerator, it causes flour to react more aggressively, producing more lumps that are significantly more difficult to break down. The ideal milk temperature sits between 20 and 25°C. Simply take it out of the refrigerator 5 minutes before starting your batter, and the difference is noticeable.
Room-temperature milk integrates far more smoothly into flour than cold milk. This single adjustment — pulling it from the fridge 5 minutes early — can dramatically reduce the number of lumps you’ll need to deal with.
Eggs and butter go in last
The order of ingredients isn't arbitrary. Adding eggs and melted butter at the end, after all the milk has been incorporated, is a deliberate technique. By that point, the flour is already hydrated and suspended in liquid. Introducing eggs and fat into a smooth base keeps the emulsion stable and avoids creating new points of resistance where lumps can form.
This sequence is part of the traditional method, which takes around 40 minutes total:
- Sift the flour twice
- Mix flour, sugar, and salt dry
- Add 25% of the milk and whisk for 30 seconds
- Repeat three more times until all the milk is incorporated
- Add the eggs and melted butter
- Let the batter rest for at least 30 minutes
Using a stainless steel whisk with tightly spaced wires gives the best mechanical action for breaking down any remaining particles. For large batches, a low-speed electric mixer works well — but keep it under 1 to 2 minutes of total mixing time to avoid overdeveloping the gluten, which makes the batter tough and the crepes less tender.
Resting the batter is non-negotiable
Mixing is only half the process. Once the batter comes together, resting allows the flour to fully absorb the liquid. The batter becomes smoother on its own, without any additional effort. This is not optional if you want the best texture.
The minimum rest at room temperature is 30 minutes, covered. For a more refined result, resting in the refrigerator for up to 12 hours works even better — just remember to take the batter out 5 minutes before cooking so it returns to a workable temperature.
maximum resting time in the refrigerator for an ultra-smooth batter
The resting time also affects the final texture of your crepes. A 1-hour rest produces softer, more pliable crepes. A 15-minute rest gives thinner, crispier results. Regional variations follow their own rules: the Breton crepe (made with salted butter and cider, no sugar) rests for 1 full hour, while the Parisian crepe (with vanilla sugar) requires only 20 minutes.
If you're looking for more quick dessert ideas that don't require long prep times, simple 3-ingredient desserts are a great complement to a crepe-making session.
The blender method: 5 minutes to a smooth batter
Not everyone has 40 minutes. The blender method is a legitimate shortcut that produces consistently smooth batter without any of the gradual pouring or whisking steps. All ingredients go in at once, and the machine does the work in 1 to 2 minutes at medium speed.
A standard blender costs between €30 and €40, making it an accessible tool for any kitchen. The high-speed blades break up flour particles mechanically, achieving in seconds what a whisk accomplishes over several minutes of careful technique.
But there's a limit. Blending for more than 2 minutes overdevelops the gluten in the flour, leading to a denser, less tender batter. Stop at 2 minutes. If time allows, a 10-minute rest after blending still improves the final result.
This method pairs well with other quick baking projects. If you enjoy fast, reliable recipes, homemade yogurt and blueberry muffins follow a similarly simple approach to batter preparation.
Straining the batter before cooking catches what you missed
Even with perfect technique, a few lumps can survive the mixing and resting process. Passing the finished batter through a fine-mesh strainer just before cooking is an optional but effective final step. It catches any remaining particles and guarantees a uniform consistency in the pan.
Straining batter before cooking is optional but eliminates any last-minute lumps. Use the same fine-mesh sieve you used for the flour — no extra equipment needed.
Adjusting consistency and cooking with precision
Even a perfectly smooth batter can behave unexpectedly. If the batter is too thick, add milk progressively while whisking — never all at once. If it's too thin, add one tablespoon of sifted flour at a time until the consistency improves. Both adjustments require patience and small increments.
Getting the cooking right
Pour 125 ml of batter (roughly one glass) per crepe for consistent results. Spread it immediately with the back of a spoon before the batter sets on contact with the hot pan. Waiting even a few seconds makes spreading difficult and creates uneven thickness.
Smooth batter isn't just aesthetically pleasing. It translates directly into crepes that cook evenly, peel cleanly from the pan, and deliver a uniform, pleasant texture in every bite. The work done before cooking — sifting, gradual incorporation, proper resting — is what makes the difference between a frustrating result and something genuinely good.
For those who enjoy exploring homemade baked goods beyond crepes, anti-waste banana bread is another approachable recipe where batter consistency plays a key role. And if you're after quick desserts ready in under 20 minutes, crepes made with the blender method fit comfortably into that category.