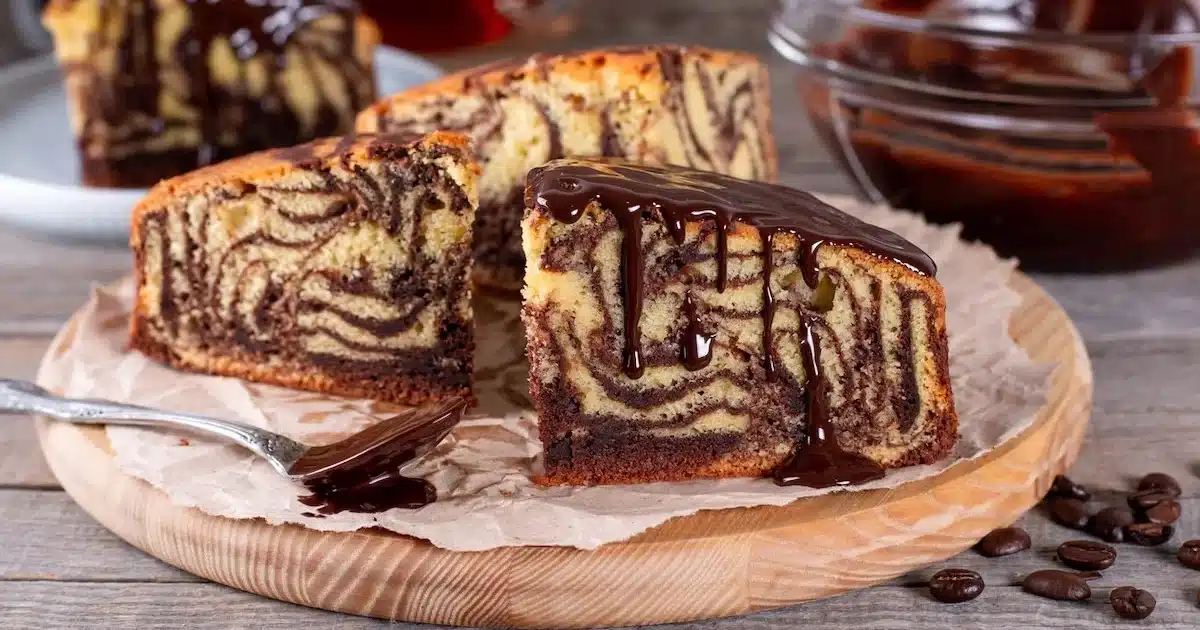
The marbled yogurt cake combines vanilla and chocolate in a single batter, split in two and swirled together before baking. 35 minutes at 180°C is all it takes to get a moist, tender crumb with a stunning visual effect. No pastry skills required — just a pot of yogurt and a handful of pantry staples.
Few recipes have the kind of staying power that the classic yogurt cake does. It has been a staple of home kitchens for generations, beloved precisely because it asks so little and delivers so much. But the marbled version takes that simplicity one step further: instead of choosing between vanilla and chocolate, you get both, swirled into a pattern that looks far more impressive than the effort involved.
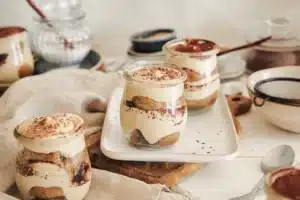
This is the kind of cake that works for a Tuesday afternoon snack, a birthday with kids, or a last-minute dessert when friends show up unannounced.
The ingredients and their proportions
The genius of the classic yogurt cake lies in its built-in measuring system. The empty yogurt pot becomes your unit of measurement, which means there is nothing to weigh and nothing to forget.
The base batter
You need 1 pot of plain yogurt, 3 pots of flour, 2 pots of sugar, 3 eggs, 1/2 pot of neutral oil, and 1 sachet of baking powder. Combine everything until the batter is smooth and homogeneous — no lumps, no streaks of dry flour. The same technique applies here as when you're working to get a lump-free batter: add the dry ingredients gradually and mix steadily rather than all at once.
The two flavor components
Once the base batter is ready, divide it into two equal parts. Into the first half, stir 20 g of unsweetened cocoa powder until fully incorporated. Into the second half, add 2 tablespoons of vanilla extract for the vanilla flavor.
One thing worth knowing: vanilla extract gives a pleasant but relatively mild aroma compared to vanilla powder or the seeds scraped from a whole pod. If you want a more pronounced vanilla flavor that holds up against the cocoa, opt for vanilla powder or a fresh vanilla bean instead.
Vanilla extract produces a lighter perfume than vanilla powder or fresh vanilla seeds. For a bolder flavor that stands out next to chocolate, use ground vanilla or scrape half a pod directly into the batter.
The marbling technique
This is the step that transforms a simple two-flavor cake into something visually striking — and it takes about thirty seconds.
Butter your cake tin generously. Then pour the two batters into the mold in alternating additions: a spoonful of chocolate, a spoonful of vanilla, back to chocolate, and so on. Once both batters are in the tin, take the tip of a knife and draw zigzag lines through the batter, moving back and forth across the surface. This is what creates the marble effect — the swirling pattern of brown and cream that runs through every slice.
The key is not to over-mix at this stage. A few decisive zigzag passes are enough. If you stir too much, the two batters blend completely and you lose the marbled effect entirely.
Baking and unmolding the marbled yogurt cake
Place the tin in a preheated oven at 180°C and bake for 35 minutes. To check doneness, insert a knife or a thin skewer into the center of the cake. It should come out completely dry, with no wet batter clinging to it. If it comes out with traces of raw batter, give the cake another 5 minutes and test again.
Once out of the oven, resist the urge to unmold immediately. Wait a few minutes for the cake to firm up slightly — this significantly reduces the risk of it breaking apart when you turn it out. Then unmold onto a wire rack and let it cool completely before slicing.
baking time at 180°C for a perfectly set marbled yogurt cake
Variations and ways to take it further
The marbled yogurt cake is also a fantastic base for experimentation. The same batter lends itself to countless variations: swap the cocoa for hazelnut spread, fold in fresh or dried fruit, add citrus zest for brightness, or flavor one half with pistachio paste or coffee extract. If you enjoy homemade baked goods with yogurt, the logic is the same — yogurt adds moisture and tenderness that keeps the crumb soft for days.
The filled version
There is one finishing touch that takes this cake from everyday snack to something closer to a celebration dessert. Once the cake is fully cooled, slice it horizontally through the middle to create two even layers. Spread a generous layer of hazelnut chocolate spread or melted chocolate on the cut surface of the bottom half, then press the top half back on. The result is a filled marbled cake that looks like it came from a bakery counter.
For anyone who loves rich chocolate bakes, this approach pairs well with the logic behind a great chocolate brownie — a soft interior, intense flavor, and that satisfying contrast between the outer crust and the melting center.
And if you're building a repertoire of quick and easy desserts that never disappoint, the marbled yogurt cake belongs at the top of the list. It requires no equipment beyond a bowl and a fork, no technical knowledge, and no expensive ingredients. What it does require is a little patience at the unmolding stage — and the willingness to stop yourself from eating it before it has cooled down.